This tutorial is written because I started to mesh simple objects for my projects and I think it is a good idea to show people how I did them. I also planned to release packs containing a quite number of meshes. I will also give tutorials how I made that meshes, so you can only make one or two if you not need a pack, or make a bit different meshes.
1. Download and installation
So, all meshes are made with blender, which is free, and once you got it you can make simple objects fast and easy. The new versions of blender are also easier to learn, although still not perfectly intuitive. This is also why my tutorials – to help learn blender. I am using the blender 2.64 by now, and hence write tutorials for this version. Gab it here:
www.blender.org
The installation should be familiar to all who had installed something, so I skip explaining it. After installation you can start blender, after it load the workbench it opens splash screen. If you close it you see the blender screen like this:
2. Adjusting preferences
The first thing to adapt is the blender preferences. Actually it is a big field of settings, but I myself changed just one. My mouse has only two buttons and a wheel which works pretty well as wheel and pretends being a middle button – I can click it, but using it as a button is quite a pain. If your mouse has a middle button, than you can skip this section.
Blender uses the middle mouse button very, very widely. Fortunately blender also allows emulating it, and this is what we activate now: Press [Ctrl+Alt+U] and then scroll to the Input page, then you can select the check box Emulate 3 Button Mouse:
3. Adjusting screen
Next thing is to change the set of editors, blender displays on start, the screen. The lowest section takes the Timeline editor, needed only to render an animation. I am not planning to do so, so I replaced this editor by UVMap editor which I need more often and which sometimes needs a full screen width. Here how I put it here and now I suggest doing the same:
At the left lower edge of the timeline editor you can find a selector. Hit it please and you’ll see a menu, in this menu select please the UVMap editor, called ‘UV/Image Editor’ in blender.
Finally we delete the initial cube. We need mostly something else and will have to remove the cube than. Just put the mouse over the cube and hit [Del] key, than Delete button in menu.
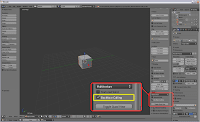
First, we add a new screen layout that will take the layout definition – simply hit the plus symbol near the screen list. The new screen is called ‘Default.001’, because we copied the default screen. Than we rename the screen to something appropriate, say ‘Second Life’:
Thank you for reading. However, I am not a blender expert. If you find errors, feel free to comment or send an IM inworld. I wil edit the post to add something important for next projects, too.
Waving
Jenna.


Keine Kommentare:
Kommentar veröffentlichen